Monday, 9 June 2008

3d Character Challenge: ITS ON!!!!

Ive always believed that sometimes in life, you've got to set a few challenges for yourself to liven things up a bit. Also, its necessary to aid the learning process, and hinder things like apathy,and lethargy. The modeling business can be a thrill, but only if you have s fixed agenda. I want all my readers to have a good experience when visiting my blogs, and not to go away empty handed.

You are the reason I blog today, and I was introduced to this blog sphere, by a fellow blogger. Because of these factors mentioned above, I have decided to set up a challenge for myself, and anyone I take on board my team, of modeling out 2d submissions from readers. You can get these submissions to me by placing a link on a comment you make about the posts.

The challenge outlines for this blog are as follows.

(1) You should submit a 2d drawing of a game character to be modeled.

(2) Characters should be:

(a) Alien , human, or humanoid (b) armoured, or none armoured, but clothed
(c) not copied from another persons work, all art work should be yours, and by submitting , you would be giving permission to freely use the work for the purposes for which this challenge are intended. (a quick 4 minuet sketch during your lunch break may do the trick)
(d) Accessories would not be modeled, only weapons fused to the game character
(e) Textured drawings may be modeled on preference to non textured ones. If you submit a black and white sketch try indicating with arrows, the colors of textures you want on the model.
(f) All modeled characters accepted and modeled will be available for free download by the readers of this blog ( for use in personal projects only).
(g) The modeling process would not be shown on the blog because of image storage space, just your 2d image, and a render of the final model, with a link to its download, or a provision to supply you, via e-mail the completed model. (how cool is that folks?)
More terms and conditions would be posted as the challenges progress. So what are you waiting for? The doors are open, and we are awaiting the first task.

Thursday, 8 May 2008

And Finally ( Round up Part 2)

[fig 15]
Look at the image above. Yes Sir! We seem to be getting there, or at least coming to the end of this modelling session. I cant wait to move on to the next one. I promise to go into more detail as my skills improve, or as I learn a faster way of doing things. Please feel free to leave your comments about this blog, be they positive or negative, as it would help me improve on techniques, and also the quality of the tutes.
We have been able to attach the aliens head onto the torso. I made some final adjustments to the diameter of the upper right limb. The characters pose at this stage is neutral. most 3d characters modelled are in this neutral pose when finished as it is the most hassle free pose for a model to adopt during the construction phase.
However it may be good practice to learn how to model with the prospect of animation in mind, and try to make some of the models joints closer to the position that they would assume during the cycle of animation. This in addition to placing the edges properly makes sure very little unwanted deformation takes place.


[fig 16]
In [fig 16] above, the model is about to be uv mapped. uv mapping is a step you have to go through before you can texture your model. Basically a texture is a set of square (2 dimensional) coordinates sort of stretched around the surface of your 3 dimensional model.
The red edges marked out show where I would want the programme to do the splitting
There are certain rules you should apply here in texture mapping a character.
  1. Small areas like the extremities should take up a lot of space on the map for any appreciable detail to be able to register.
  2. Go to town with allocating space to the head and face as well. Human beings instinctively look at an object that represents a face, be it a sculpted statue, a drawing, or a 3d model. By detailing the face properly, it would make the model stand out.
  3. Try not to waste space if you can. Wasted space is represented by the areas not covered in the map.


[fig 17]

The [fig 17] shows the splitted uvs, which were split according to the red lines I selected. To me this looks like about 80% utilisation of texture space, which isn't all that bad. Hey maybe I should try to write a script to be able to compute the percentage utilisation, that would be nice and mighty useful.

Finally the images below show how the fully textured character looks. It took me about 2 days to completely model and texture him, under normal circumstances, I can work much faster, but I was distracted on other projects during the modeling and making of this tutorial.

[fig 18]


[fig 19

[fig 20]


[fig 21]


Tuesday, 6 May 2008

The Process (Round up Part 1)

[fig 11]
In the above diagram, both the lower limbs are in place. We did duplicate the left leg as we said. The entire model is asymmetrical in nature, thus we had to do things in phases. Remember that this 3d model is really just a basic one, and as our experience grows, we would be able to move on to even more complex geometric shapes.
We are now going to focus on the head.


[fig 12]
The head we want should have certain features. Although you cant see it from the 2d drawings [fig 1 & 2], the back of the head is actually elevated. ( I did not supply a side shot, which would have shown it ). We have revealed the hidden head which was there all along, and started some modifications. The back of the head is elevated above the rest of the skull, thus it is lifted. The aliens nose is lifted as well. This model is not going to have any moving mouth parts, and also, the eyes would be stationary. All of the fine facial detail would be applied using the texture when we get to that stage.


[fig 13]

In the picture above, the nose is flattened, we tried to use the limited polygons we have to mould the general shape of the head. I mentioned that the features would be painted on, but I also want to point out that in a 3d real time model, there should be no holes in the geometry. This I believe would cause problems during the real time rendering or compilation.


[fig 14]
So here we have the finished modelled alien head. You have to join this to the main torso, so it's important that the number of vertices around the rim of the lower part of the neck matches that on the torso. Also try not to create an extra line of unneeded polygons around the neck when joining together.
In the next post, Ill talk a little bit about laying the uvs, and texturing our game character.


The Process ( Shaping Part 2)

[fig 7]
So now we can make a bit more progress. In the diagram above, the deleted template upper limb is reformed into our metallic mechanical left 'arm' of our character. It is a cylindrical contraption. I do like the process of modelling mechanical objects because the modelling is precise in nature. There's a lot of edge division, selection and extrusion of polygons. Bevelling or chamfering are features as well. Above, we selected the open edges of the hole created by the deletion, and duplicated them, before extrusion sideways. We made sure the cross section of the edges was as round as possible before doing any of this. (this was achieved by adjusting vertices from a side view)


[fig 8]
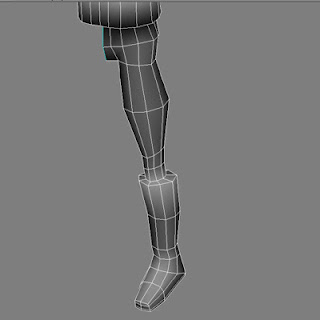
In [fig 8] above, all of the polygons of the right leg have been selected. Our aim here is to delete them, then completely reform the characteristic emaciated type legs that our alien sports in [fig 1 & 2], from the remaining undeleted left leg. Once this is done. we would then proceed to select and duplicate/mirror the left leg to form a right limb.


[fig 9]
Remember all the general modelling principles you have to apply whilst modelling movable or animatable parts of a real time 3d character. Some of these are:

  • Always keep the highest density of geometry clustered around the actual parts of the model that undergo deformation.
  • The edges of the geometry that surround these areas must be angulated in such a way that even with a fair amount of deformation, the shape or topology would be maintained or preserved to a reasonable extent.


[fig 10]

In the picture above, the lower limb has started to take shape. Some polygons were selected and scaled down around the knee area, whilst a boot was shaped. Take a closer look at the foot in [fig 10], and compare it to that in [fig 9], you would see that it has a fewer number of faces/ polygons. We had to look for areas where we could reduce the polygon count to compensate for the polygons created by forming the demarcation between the knee and the boot. When actively modelling any real time 3d object, your brain is constantly trying to work around issues relating to polygon count form and function. If you decided to switch to modelling characters that were intended for a short movie or some pre-rendered animation, then its a whole different ball game, as you would not be restricted by normal real time quotas.

The real time 3d modelling principles and skills I describe here could take some time to perfect. It is an art in itself, and the true art will be revealed in my forthcoming e-book about character design which I would be announcing on this blog to all my readers in the future.


Sunday, 27 April 2008

The Process (Shaping Part 1)


[fig 3]
Now look at the image above, it shows the modeling process in action. What is happening is I'm trying to shape the character from an existing template of a basic man which comes with the software application I use. Ive removed the head from the scene by selecting extracting, and hiding it. The right arm of the character in the above figure, is already in progress. It is a mechanical, metallic looking contraption, with a pincer-like distal extremity.


[fig 4]
The shot above shows in closer detail how the character is forming. I have formed the claw-like (Y shaped) ends. A lot of the detail of the model would be contributed by the texture, and thus, there is no need to model all the detail out. This is going to be a low polygon real-time 3d character for use in a computer game, or a similar real-time environment, so the emphasis here is to try and avoid using unnecessarily high amounts of polygons if we can.


[fig 5]
In the picture above, the polygons around the waist line were selected, and extruded. Since the belt of the character is a prominent aspect of his look, that had to be modelled hat least half of the way, rather than to rely solely on texture painting. The polygons were also scaled down in the vertical direction. (The red areas show the selected polygons)
The reason why I scaled them down like this is that if the character is looked at head on, you would loose the sense of depth for the belt if all the polygons were the same height.


[fig 6]
The shaping of our character continues. Here, the left humanoid arm was selected and deleted. We are designing an alien entity here, actually not just an alien entity, but a mean alien entity. The left 'arm' has a laser firing weapon of some sort. Its a cylindrical structure with a fair amount of surface detail. Again, we would not be modelling every aspect of the mechanical arm, just the gross details. The texturing would be used to fill in everything.
I'm going to step things up with this tutorial and post at a faster rate until its finished so that we can move on to the next modeling project. As the time goes by, the tutorials will be written with more detail.


Friday, 25 April 2008

The drawings

Starting out any modelling project would normally begin with getting a pencil and paper out to draw the idea down. I'm going to break the tutorial down until I sort out the image storage space issues and options here for me in this blog. Here is the simple character I drew earlier on.


[fig 1]

The picture is small, but just big enough to outline what we should be aiming at, a simple 3d low polygon character for use in a computer game. This next update to the drawing shows the colour concept we have in mind when we get to the texturing phase.


[fig 2]
An alien entity with body armour, and metallic pincer like appendages, amongst other things. I'm going to begin with the body. Usually, for symmetrically aligned 3d images or models, the modeller models only one half. When that half has been completed, he or she would proceed to copy or mirror that half, to form the other side of the model. Mirroring creates a laterally inverted representation of the first half.


You know what? I'm going to cut out the fancy language in this tutorial, and stick to simple effective English. Lateral inversion just means your left becomes right, and your right becomes left, just the same as when you look into a mirror.


Ill stop here now to sort out some issues that need configuring on my blog, it seems I don't really need to break up my tutorials into little pieces. I have a lot of images as well, and I need to make sure that I don't run out of storage space.
Before I go, I'd just drop a few points when it comes to character creation. There are many approaches to the topic, you can get inspiration from many sources around you. All it takes really is for you to stretch the boundaries of your imagination. When I started this blog, I titled it 2 worlds because apart from the real world we see around us, I do spend quite a lot of time in cyberspace these days, which although is vast, in the true sense of the word, in comparison to the unknowns of distant galaxies and the cosmos, it is actually insignificant in its size. It is a form of escapism, I cant help but picture the ostrich which seeks refuge by hiding its head underground when threatened.
Talking about stretching your imagination, we all talk and speculate about the possibility of intelligent life existing somewhere in the universe. We've all been enthralled by alien species in films and things of the sort. The question I want to ask is if they do exist somewhere out there, whats the guarantee that they would assume the same shape and humanoid form that we ourselves were created in? My immediate answer is there's no guarantee. The only time that I would say with 100% conviction that that would be the case is if they originated from a planetoid body with features almost Identical to the mother earth we know.
By imagining inhabited planets with features drastically different from earth, you would be on the first step towards the conceptualisation of your unique character. Larger gravity would equate to larger mesomorphic entities. A planet with a harsh atmosphere, possibly with circulating poisonous gases would dramatically alter the breathing apparatus of any alien species from the ones we know. That's just to provide some food for thought, I'll stop typing here now.

Tuesday, 22 April 2008

Concept

Okay, its been a while since I last posted, the idea Is to put my thoughts down as often as possible, but of lately Ive seen myself occupied with other things. I am fully committed to this blog as you will find out as time goes by.
So how do we start the process of modeling a 3d object. Firstly we have to form a concept of what were aiming to achieve on the long run, on a piece of paper, or on a blank canvas using a 2d paint program such as the gimp for example. Over the years I have been trying to perfect the art of molding out a true representation of any thing I sketched in 2d. I soon found out that virtually any thing can be forged, the only limiting factors are ones imagination, and the polygon count of the model in question.
See below a rough image of a 3d game character I thought of and sketched this evening.


As you see, hes a character with a fair amount of complexity, and detail. This 2d image is going to be our template, or tracing image to work on. If you read a 3d car modeling tute, you'd agree that a lot of reliance is placed on the cars blueprints, which the 3d modeler uses to sort of shape the car. The same principle can also be applied to humanoid modeling, but there are certain disadvantages about doing so. Some of these are :


(1) You would need precisely cut sections or views for example, front, side and maybe back. This could be a real pain to assemble.


(2) By its very nature, it is a time consuming process, as after you get the slices you need, you may have to employ image planes in the 3d modeling package of your choice.


(3) Thirdly, I feel that after all the pain of setting these reference images up, a modeller still finds that he or she tends to rely heavily on the perspective and camera views during modeling, that it would make more time saving sense if the skill of modeling without 'tracing' a blueprint were mastered.

3d modeling is essentially digital sculpting, I would expect that any good real life sculptor would flourish at this art. I would also be fair to say that generally, a good sculptor would make a good 2d artist.
Just to notify any readers of this blog, I will be breaking the contents down to regular small posts, rather than a long tutorial that comes once a week.